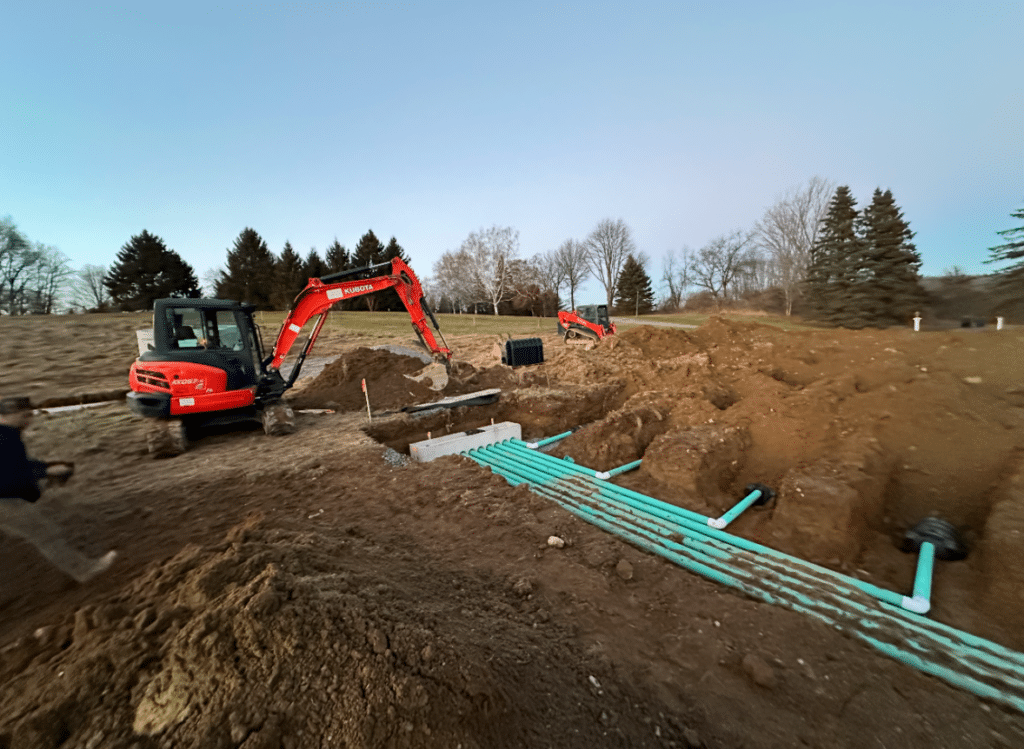

Fast Track Summary
-
Identify Hydraulic Overload vs. Biomat Clogging: Saturated leach fields often stem from either sudden volume spikes or long-term anaerobic slime buildup blocking soil absorption.
-
Diagnose Mechanical & Thermal Failures: Severe frost lines and freeze-thaw cycles in Northeastern PA cause distribution box shifting, frozen effluent lines, and float switch failures in pump chambers.
-
Isolate Failure Points Systematically: Troubleshooting starts inside the building envelope to rule out internal plumbing traps before assessing tank levels, baffle integrity, and subsoil saturation.
-
Mitigate High-Risk Structural Collapses: Surface pooling, severe sewage odors, and gurgling drains indicate immediate risks of groundwater contamination and structural soil compaction that require professional intervention.
How to Troubleshoot a Failing Septic System: A Master Field Guide
When a residential wastewater system begins to fail in Northeastern Pennsylvania, the warning signs rarely start with a dramatic surface explosion. Instead, failure signals itself through slow-draining fixtures, faint sulfurous odors near the foundation during a thaw, or a subtle gurgling sound in the lowest bathroom when the washing machine drains. Across Wayne, Pike, and Monroe Counties, local geology turns minor plumbing annoyances into full-scale environmental hazards. Mountainous terrain, high water tables, and tight, clay-heavy soils present unique challenges that standard plumbing guides fail to address.
Troubleshooting a failing septic system requires looking beyond individual pipes and analyzing the entire site ecosystem. Every component—from the solid-settling tank to the delicate soil microbes in the drainfield—operates within tight biological and hydraulic tolerances. When cold weather hits and the ground freezes past the standard 36-inch frost depth, small system imbalances rapidly escalate into frozen lines, flooded basements, and structural soil failure.
The Standard Septic Diagnostic Flow Sequence
-
Check Internal Plumbing Fixtures: Determine if slow drainage is isolated to a single sink, shower, or toilet. If only one fixture acts up, clear local pipe traps or vent stacks. If every fixture gurgles or backs up, move downline toward the main building drain.
-
Inspect Septic Tank Operating Levels: Uncover primary access lids to evaluate working liquid heights. Levels below the outlet pipe invert indicate a cracked, leaking tank structure. Levels overtopping the outlet pipe or filling access risers confirm a downstream obstruction or a saturated absorption bed.
-
Test Effluent Dosing Chamber Components: Evaluate electrical control panels, float switches, and pump impellers inside secondary dosing tanks. Check for frozen force mains, stuck tethered floats, blown control fuses, or burnt pump motor windings whenever high-water alarms activate.
-
Evaluate Distribution Box & Leach Field: Uncover the distribution structure to check for uneven soil settlement, tilted headers, or root blockages. Inspect lateral observation ports and mound slopes for surfacing effluent, dark biomat accumulation, or winter ice capping.
Step-by-Step Diagnostic Protocols for Common Septic System Problems
Troubleshooting septic system problems requires a systematic, step-by-step diagnostic process that isolates internal plumbing blockages from structural tank failures, pump chamber mechanical breakdowns, and subsoil absorption field clogging. Following the wastewater flow path from building drains to subsoil absorption areas prevents costly misdiagnoses and targets the exact point of mechanical or biological failure.
Phase 1: Internal Plumbing vs. Main Line Diagnostics
Before opening outdoor riser covers, verify whether the drainage issue affects a single fixture or the entire structure. If only one shower or sink drains slowly, the obstruction sits inside the building’s internal plumbing vents or drain traps.
When every drain in the home gurgles, backs up, or smells of sewer gas simultaneously, the problem lies downline in the main waste pipe, the septic tank inlet, or the absorption field.
Check the main line cleanout plug inside the basement or crawlspace. Unscrewing this plug reveals whether effluent is holding back inside the building pipe or flowing freely outward toward the tank.
-
Standing Water in Cleanout: Waste lines choked with grease, root intrusion, or structural pipe sags hold water back before it reaches the tank.
-
Dry Cleanout Pipe Interior: The blockage sits further downstream, or the primary septic tank is overfull and holding head pressure against the incoming line.
-
Persistent Toilet Fixture Gurgling: Air trapped between an incoming slug of water and a submerged tank inlet forces sewer gas back through fixture traps.
Phase 2: Tank Liquid Level and Baffle Evaluation
Carefully remove primary tank access lids to inspect working liquid heights. Standard concrete and polyethylene septic tanks operate naturally full to the invert of the outlet pipe.
Under normal operating conditions, wastewater separates inside the primary tank into three distinct layers:
-
The Floating Scum Layer: Formed at the top surface by fats, oils, grease, and lightweight buoyant particles.
-
The Clear Effluent Zone: Sits in the middle section of the tank, where clarified liquid is drawn off and directed to the downstream drainfield.
-
The Settled Sludge Layer: Accumulates at the concrete tank floor, containing heavy organic solids undergoing anaerobic digestion.
Tank Layer & Component Diagnostics
-
Floating Scum Layer
-
Primary Function: Traps fats, oils, grease, and lightweight buoyant solids.
-
Failure Indicator: Layer exceeds 6 inches or spills over a missing outlet baffle.
-
Corrective Action: Schedule tank pumping; install a protective sanitary outlet tee filter.
-
-
Clear Effluent Zone
-
Primary Function: Holds clarified liquid between scum and sludge layers for discharge.
-
Failure Indicator: High turbidity or suspended solids flowing into distribution lines.
-
Corrective Action: Reduce daily hydraulic volume; verify biological grease digestion.
-
-
Settled Sludge Layer
-
Primary Function: Stores dense organic solids undergoing anaerobic decomposition.
-
Failure Indicator: Sludge depth fills more than one-third of total tank volume.
-
Corrective Action: Perform full vacuum pump-out; clear solid accumulation at tank bottom.
-
-
Inlet & Outlet Baffles
-
Primary Function: Prevents floating scum and bottom sludge from escaping into field.
-
Failure Indicator: Concrete corrosion, missing PVC tees, or thick solid blockages.
-
Corrective Action: Replace deteriorated baffles with heavy-duty PVC sanitary tees.
-
Examine concrete or PVC inlet and outlet baffles closely. Missing or deteriorated baffles allow floating scum and settled sludge to flow directly into absorption trenches, accelerating soil failure.
-
Submerged Outlet Baffle Tees: High liquid levels overtopping the baffle indicate that the leach field or distribution box is no longer accepting fluid.
-
Structural Baffle Gas Erosion: Hydrogen sulfide gas inside tank vapor spaces eats concrete baffles over time, causing them to collapse and dump floating solids downstream.
-
Inlet Pipe Solid Clogging: Heavy solids accumulating directly beneath the inlet tee form a solid wall that prevents incoming household waste from entering the chamber.
Phase 3: Dosing Chamber and Pump Diagnostics
Properties utilizing elevated sand mounds or pumped distribution networks rely on a secondary pump chamber equipped with float switches and an effluent or grinder pump. When a high-water alarm sounds, immediate mechanical troubleshooting is required to prevent a full backup into the residence.
Inspect the electrical control panel for tripped circuit breakers, blown fuses, or thermal overload resets. Manual activation of the pump switch helps confirm whether the motor is receiving power or if the internal windings have burned out.
-
Stuck Control Float Switches: Fats, oils, and grease coat tethered float switches, holding them down so they fail to signal the pump when liquid levels rise.
-
Worn Pump Impeller Blades: Effluent pumps running continuously without lowering water levels usually have sheared impellers or severe mineral scale buildup inside the pump volute.
-
Failed Heavy Check Valves: Broken check valves allow pumped effluent inside force mains to flow backward into pump tanks, creating continuous loops that burn out motors.
Phase 4: Distribution Box and Field Inspections
The distribution box splits liquid effluent evenly across all lateral pipes in the absorption field. Soil settlement, heavy machinery traffic, or frost heaving can tilt the box, sending all wastewater into a single trench while leaving others completely dry.
Uncover the distribution structure and inspect internal flow equalizers. Solid debris or root mats blocking these outlets force effluent to pool at the surface or flood back into the primary tank.
-
Inspect Structural Box Alignment: Verify that the concrete or plastic distribution box remains perfectly level across all outlet ports to ensure equal hydraulic loading.
-
Clear Internal Pipe Outlets: Remove root intrusion, bio-slime, or mineral scale from flow equalizers to restore balanced effluent distribution across all laterals.
-
Examine Lateral Observation Ports: Check drop pipes in absorption trenches for standing liquid, which signals subsoil saturation or biomat sealing.
-
Tilted Distribution Box Outlets: Soil settling under one corner of a concrete box starves part of the drainfield while hydraulically overloading another section.
-
Ponding in Lateral Trenches: Standing water inside lateral inspection ports indicates that surrounding stone aggregate and native subsoil have lost absorption capacity.
-
Surfacing Dark Sewage Odors: Dark, smelly effluent bubbling up above leach field lines confirms that the receiving soil interface is sealed by biomat buildup or frost.
To isolate internal plumbing issues from structural site failures, home managers should request professional Septic System Inspections from experienced regional specialists who understand local environmental dynamics.
Advanced Environmental Mechanics: Frost Lines, Heavy Clay, and Hydraulic Clogging
Resolving complex septic system problems requires an understanding of how environmental factors—such as frost line depth, heavy clay soils, and biological clogging—interact with system hydraulics and subsoil mechanics. Pennsylvania and New Jersey feature challenging site conditions, including glacial till, dense shale, and heavy clay soils with poor percolation rates.
Thermal Mechanics and Winter Freeze Protocols
Standard trade advice suggests burying pipes below the local frost depth—typically 36 to 42 inches across Pennsylvania. However, septic components like shallow absorption pipes, sand mounds, and septic tank risers often sit well within this freeze zone to maintain proper soil aeration.
Thermal Soil Profiles Across Winter Freeze Zones
-
Surface Atmospheric Air Zone: Ambient air temperatures dropping between -10°F and 20°F rapidly pull heat from bare, uninsulated topsoil.
-
Active Frost Penetration Zone (0 to 42 inches): Uninsulated lateral lines, distribution boxes, and shallow tank risers located in this upper zone experience rapid ice accumulation during low-use periods or draughty winter nights.
-
Deep Soil Thermal Reserve Zone (Below 42 inches): Deeper native subsoil maintains a stable temperature range of 45°F to 55°F, providing thermal energy that protects properly sloped, deep-set tanks and force mains.
Snow cover acts as natural thermal insulation for the soil. When property owners clear snow off a leach field or drive snowmobiles over a sand mound, they compact the snow, strip away its insulating air pockets, and drive frost deep into the subsoil.
-
Draft-Induced Line Freezing: Cold air entering uncapped inspection ports or loose tank risers travels up open outlet pipes, creating ice plugs inside thin-wall PVC lines.
-
Low-Flow Ice Accumulation: High-efficiency toilets, trickling faucets, and leaky flapper valves send tiny, slow trickles of water down drain lines. In sub-zero temperatures, these thin trickles freeze in layers inside cold pipes, eventually building into a solid ice dam.
-
Pump Chamber Force Main Freezing: If a force main pipe lacks a weep hole or proper slope to drain back after a pump cycle, standing water inside the pipe freezes solid, bursting check valves and burning out pump motors.
Hydraulic Overload and Subsoil Biomat Mechanics
Heavy clay soils contain dense, tightly packed particles with microscopic pore spaces. When these soils become saturated during spring snowmelt or heavy autumn rains, their ability to absorb effluent drops toward zero.
The subsoil absorption bed relies on a sequential filtration profile:
-
Perforated PVC Lateral Pipes: Distribute clarified effluent evenly across the aggregate absorption bed.
-
Washed Drainage Stone Bed: Provides temporary storage volume while allowing liquid to trickle downward toward native ground.
-
The Anaerobic Biomat Layer: Formed by bacterial colonies at the stone-soil interface; digests organic matter but restricts downward flow if allowed to grow excessively thick.
-
Native Clay and Glacial Subsoil: Receives treated effluent for final biological purification and groundwater recharge.
Over time, anaerobic bacteria digesting organic waste at the soil-stone interface form a dense, jelly-like black layer known as “biomat.” While a thin biomat layer helps slow effluent flow to ensure proper biological treatment, excessive organic loads turn the biomat into an impermeable barrier that completely seals the soil.
-
Biomat Slime Overgrowth: Draining water high in fats, oils, grease, or laundry lint feeds anaerobic microbes, expanding the biomat until effluent can no longer pass through into native clay.
-
Hydraulic Surge Shock: Running four or five loads of laundry back-to-back floods the septic tank with hundreds of gallons of water in a few hours. This sudden surge pushes settled solids out of the tank and directly into the drainfield.
-
Groundwater Tank Infiltration: Structural cracks in aging concrete tanks or unsealed riser joints allow high spring groundwater to seep inside. The system processes thousands of extra gallons of clean water, washing out the tank and drowning the leach field.
When severe hydraulic overload or biological clogging causes widespread leach field failure, property managers often need advanced Leach Field (“Turkey Mound”) Repair & Installation to restore environmental balance and site drainage.
Field Troubleshooting & Diagnostic Guide
-
Gurgling Fixtures & Slow Basement Drains
-
Primary Mechanics: Main line restriction, submerged tank inlet, or blocked roof vent.
-
Seasonal Factors: Worse during severe winter freezes or high spring water tables.
-
Technical Solution: Perform camera inspection; clear line obstructions with High-Pressure Drain Jetting (Hydro-Jetting).
-
-
Lush, Dark Green Grass Over Absorption Trenches
-
Primary Mechanics: Effluent surcharging upward toward the root zone due to subsoil clogging.
-
Seasonal Factors: Most visible during dry summer months or early spring growth.
-
Technical Solution: Test soil percolation; drop hydraulic loading; install effluent filter; rest damaged laterals.
-
-
High-Water Alarm Sounding in Pump Chamber
-
Primary Mechanics: Mechanical pump failure, stuck float switch, or frozen force main line.
-
Seasonal Factors: Common during sub-zero cold snaps or sudden freeze-thaw cycles.
-
Technical Solution: Test electrical circuits; clean floats; service or install an Effluent Pump Service & Replacement.
-
-
Sewer Odor Near Tank or Downwind of Field
-
Primary Mechanics: Cracked tank risers, missing pipe seals, or saturated biomat layer surfacing.
-
Seasonal Factors: Amplified during low barometric pressure or warm, humid weather.
-
Technical Solution: Seal tank access points; repair broken outlet tees; replace deteriorated concrete covers.
-
-
Surface Pooling Over Sand Mound or Trench Lines
-
Primary Mechanics: Total biomat failure, severe soil compaction, or frozen absorption bed.
-
Seasonal Factors: Frequent in heavy clay soils following rapid snowmelt events.
-
Technical Solution: Pump tank contents immediately; clear main lines; perform professional subsoil evaluation.
-
Preventive Site Actions for Long-Term System Protection
-
Preserve Natural Snow Cover: Keep snow undisturbed over absorption areas during winter months. Placed or compacted snow loses its insulating air pockets, allowing frost to penetrate deep into lateral trenches and freeze buried distribution pipes.
-
Stagger Household Laundry Loads: Space out washing machine use across the week rather than processing multiple loads in a single day. Staggering water discharge prevents hydraulic surges that flush suspended solids out of primary tanks.
-
Insulate Exposed Access Components: Cover shallow tank access lids, distribution boxes, and sand mound shoulders with an 18-inch layer of dry straw or uncompacted leaves before cold weather sets in to protect components from deep frost penetration.
-
Repair Internal Plumbing Leaks: Fix running toilet flappers, leaking faucets, and reverse osmosis discharge lines immediately. Continuous low-volume trickles freeze in layers inside cold main lines during sub-zero nights, building solid ice dams.
-
Verify Force Main Drain-Back: Ensure effluent pump discharge pipes feature functional weep holes below the local frost depth. Proper weep holes allow standing water inside force mains to drain back into pump chambers, preventing pipe bursts.
If a severe winter freeze or heavy hydraulic blockage causes a complete system backup, property owners can request Emergency Septic Pumping to relieve head pressure and protect internal plumbing fixtures. Learn more about Triple J Services and our field equipment.
Regulatory & Technical References
-
Pennsylvania Department of Environmental Protection (PA DEP): Title 25, Chapter 73 – Standards for Onlot Sewage Treatment Facilities
-
US Environmental Protection Agency (EPA): A Homeowner’s Guide to Septic Systems
-
National Oceanic and Atmospheric Administration (NOAA): Regional Frost Depth & Climate Maps
Key Takeaways
-
Isolate internal plumbing issues first: Test cleanout plugs and individual fixtures to rule out internal traps before uncovering septic tanks or clearing lines.
-
Monitor working liquid heights: Standing liquid above the outlet pipe points to a clogged distribution box or an oversaturated leach field, while low water levels signal a cracked, leaking tank.
-
Protect system components from cold weather: Maintain undisturbed snow cover over drainfields and insulate exposed risers to keep frost from freezing buried pipes and pump chambers.
-
Manage household water volume: Space out laundry cycles and eliminate leaking fixtures to protect soil absorption fields from hydraulic overload and premature biomat failure.
-
Schedule regular maintenance and inspections: Have licensed site specialists inspect tanks, clear baffles, and service effluent pumps to prevent costly structural failures.
Professional Site Support
Addressing complex septic system problems demands field-tested expertise, heavy-duty excavation equipment, and a deep understanding of local soil conditions. The team at Triple J Services delivers advanced septic engineering, high-pressure line jetting, pump replacements, and full-scale site drainage solutions throughout Lackawaxen, PA, Wayne County, Pike County, Monroe County, and northern New Jersey.
To schedule a diagnostic site evaluation, pump chamber repair, or system inspection, contact Triple J Services today at (845) 750-5222 or visit Triple J Services.